
Use Siri to Configure Your ASUS Router - Part 2
This is part 2 of a 4 part series.
Part 1 - Capture the commands
Part 2 - Setup Linux and Create Scripts
Part 3 - Install and Configure TriggerCMD
Part 4 - Configure iOS Shortcuts and use Siri
Setup Linux Environment and Create Scripts
Now that we have the four curl commands used to perform the login/logoff and enable/disable VPN events, we can proceed to creating an environment from which to run these off of.
For this example, I will be deploying a CentOS image onto an ESXi host in my home lab. Deploying ESXi is outside of the scope of this guide. Your Linux OS can be deployed anywhere inside your home network, just make sure it's on something that's running 24/7 so it can be accessed whenever you are away from home and need to VPN in.
You can also deploy any other os supported by TriggerCMD, the program is distributed as both RPM and DEB packages so I would recommend sticking to CentOS or Ubuntu to keep things simple.
If you have a raspberry pi lying around, this can also be used.
Installing CentOS
Download the CentOS 8 media at https://www.centos.org/download/ and choose the linux DVD option.
Boot your physical host (or virtual) into the CentOS media.
Select Install to boot the installer

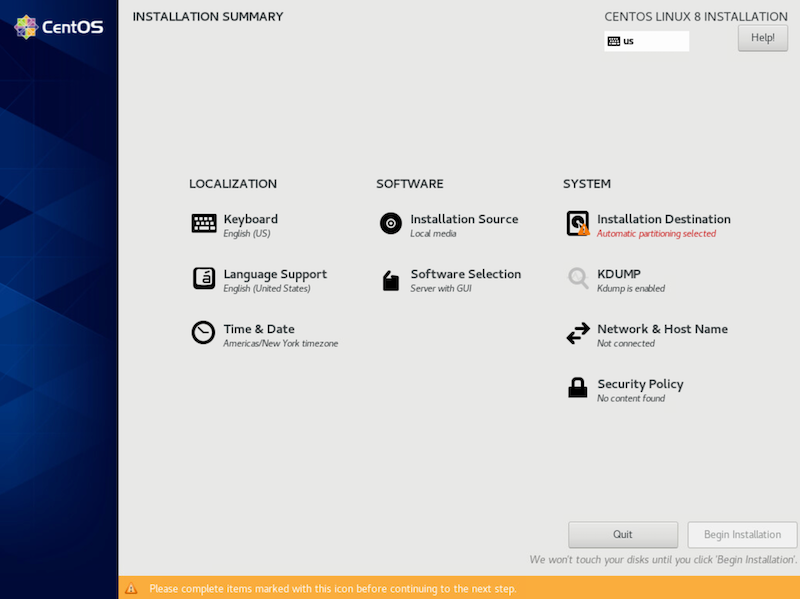
Select your language and click continue.
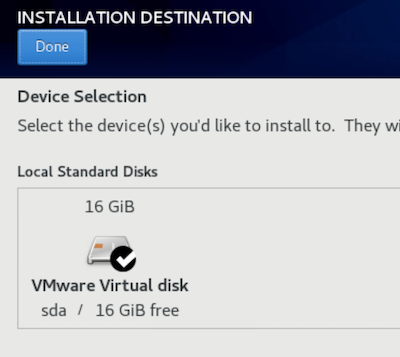
Notice the error on automatic partitioning. Click on installation destination.
Then, select done.
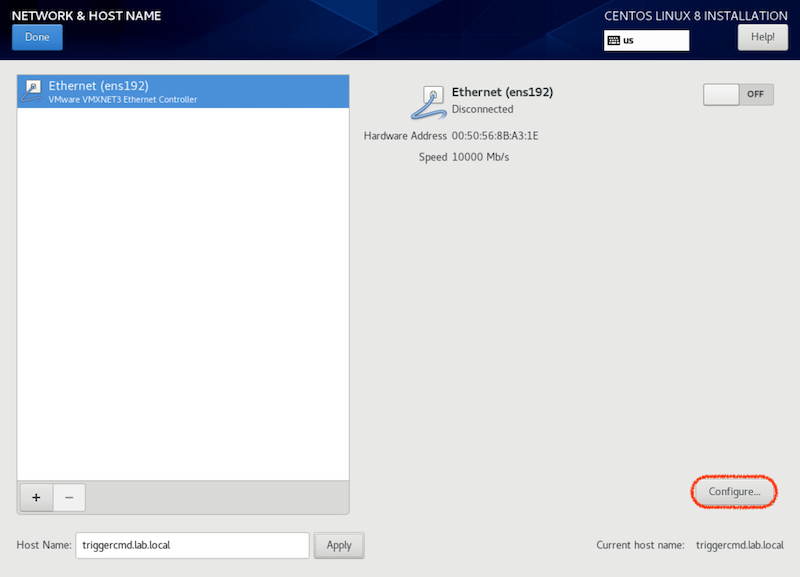
Next, select Network and Hostname

Near the bottom of the network settings page, configure a hostname. Then click apply.

To the right side of the screen, click configure.
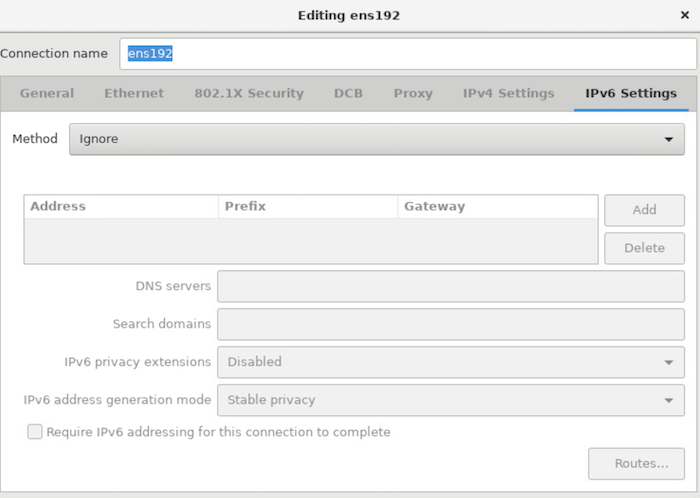
Select IPv6 and from the drop down, choose Ignore. (I don't need IPv6 for this setup, if you do, then configure IPv6 instead).
Click on IPv4. From the drop down, select manual. Click Add and enter in an IP address that's in your home network's CIDR. (typically either 192.168.0.0/24 or 192.168.1.1/24). Once set, click save.
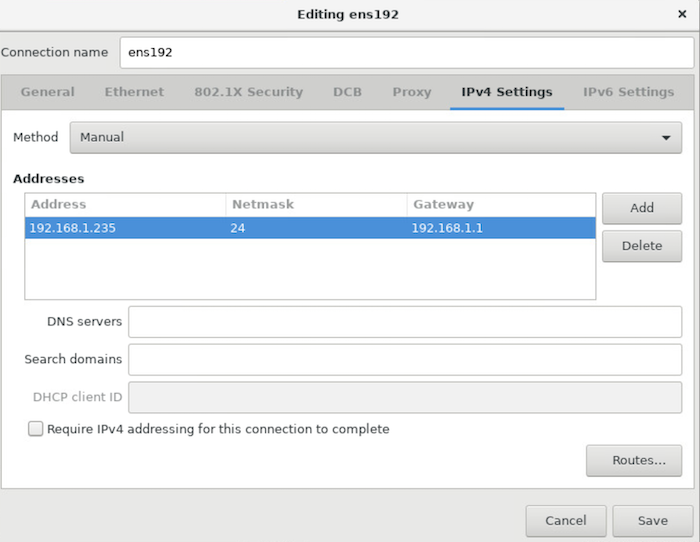
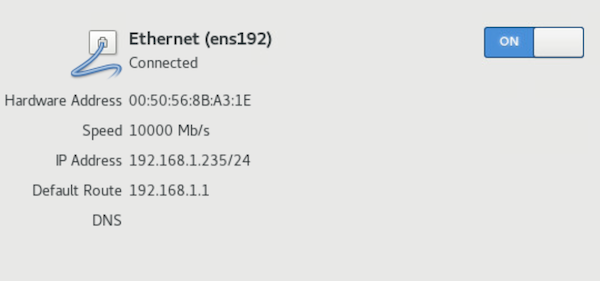
Flip the switch to on to enable this interface. Then click done in the upper left corner.
Under software selection, ensure that server with no GUI is selected. Then click Begin Installation.
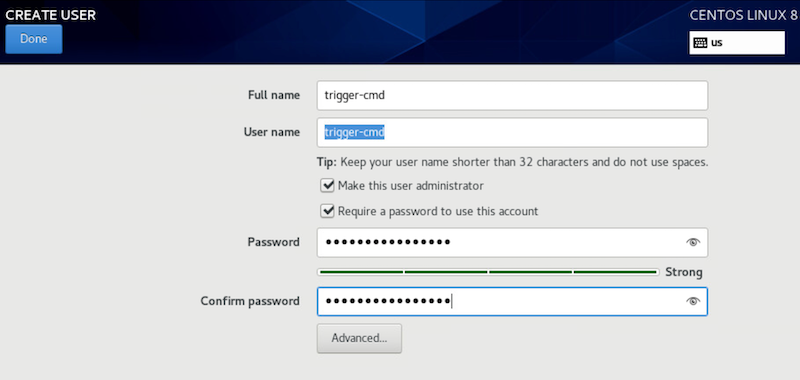
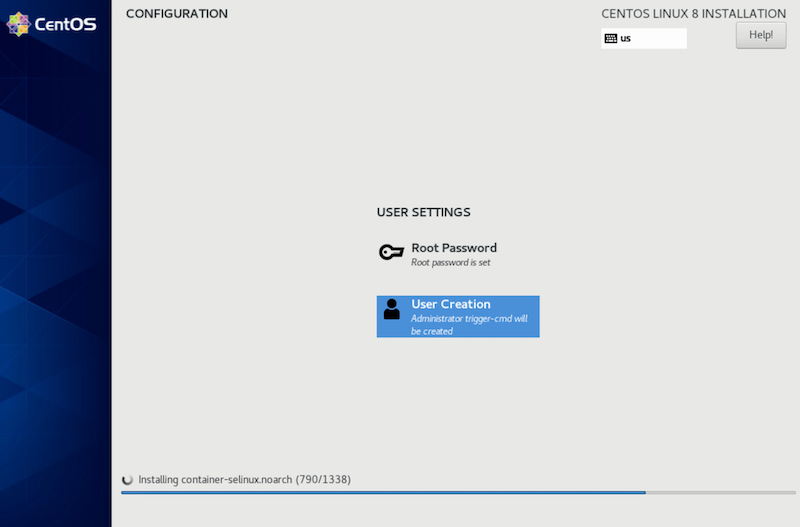
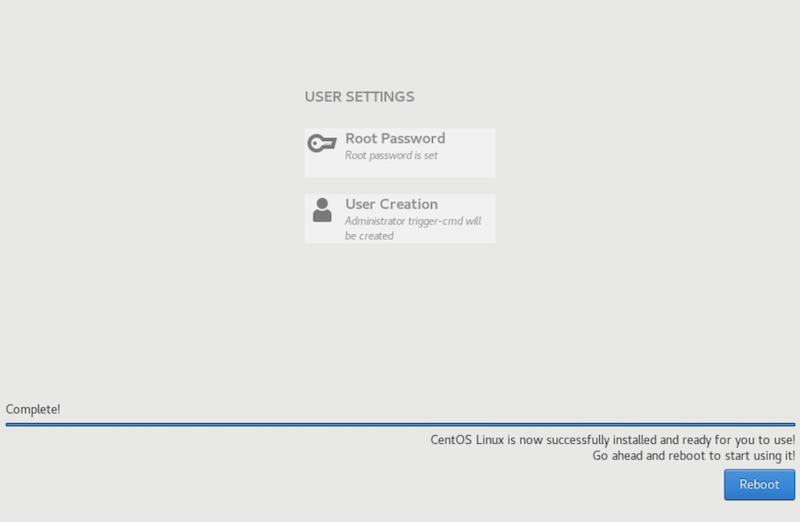
During the install, assign a password to root.

Also, create a non-root user and assign a password to that account too. Make the non-root account an administrator. Click Done.
Wait for the install to finish.
Once complete, click reboot.
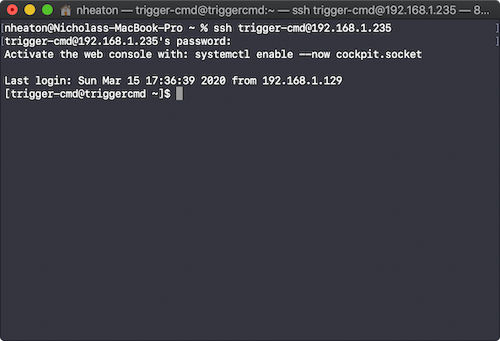
Login to your CentOS instance
We will ssh into the CentOS instance to copy over the curl commands and create the bash shell scripts.
But first, let's do some updates.
run "sudo yum update -y"
Once done, reboot and ssh back in.
SSH into host as non-admin user
Create the Enable VPN Script
Type "vi Enable_VPN.sh" and press enter.
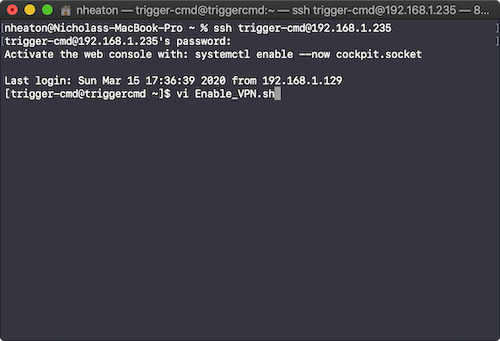
Type "i" to go into insert mode.
Paste in the following data.
<login curl command> && sleep 3 && <enable VPN curl command> && sleep 30 && <logout curl command>Replace the following items. These are all obtained from step 1.
<login curl command> -- curl command to login to ASUS router
<enable VPN curl command> -- curl command to Enable VPN Services
<logout curl command> -- curl command to logoff the router
TIP: Refer to the example script file below. Make sure to replace these items
- router IP (shown as 192.168.1.1), this is default for most users but change this to your router's IP if it differs
- router-auth - replace this with the login_authrorization you recieved in step 1
- pre-shared-key - this is the preshared key for the VPN Server
- vpn-user - this is the username of the VPN user
- vpn-password - this is the VPN password
##Login to Router
curl -c /tmp/cookie-jar.txt 'http://192.168.1.1/login.cgi' \
-H 'Referer: http://192.168.1.1/Main_Login.asp' \
--data-raw 'group_id=&action_mode=&action_script=&action_wait=5¤t_page=Main_Login.asp&next_page=index.asp&login_authorization=<router-auth>' \
--insecure \
&& sleep 3 &&
## Enable VPN
curl -b /tmp/cookie-jar.txt 'http://192.168.1.1/start_apply.htm' \
-H 'Referer: http://192.168.1.1/Advanced_VPN_IPSec.asp' \
--data-raw 'productid=RT-AX58U¤t_page=Advanced_VPN_IPSec.asp&next_page=Advanced_VPN_IPSec.asp&modified=0&action_mode=apply&action_script=ipsec_start&action_wait=30&preferred_lang=EN&ipsec_server_enable=1&ipsec_profile_1=4%3EHost-to-Net%3Enull%3Enull%3Ewan%3E%3E1%3E<pre-shared-key>%3Enull%3Enull%3Enull%3Enull%3Enull%3E1%3E10.10.10%3Enull%3E1%3Enull%3Enull%3E0%3Enull%3Enull%3Enull%3E1%3E%3E%3Eeap-md5%3E1%3E500%3E4500%3E10%3E1%3Enull%3Enull%3Enull%3Enull%3E%3C%3C%3C%3C%3E1&ipsec_client_list_1=%3C<vpn-user>%3E<vpn-password>&ipsec_preshared_key=<pre-shared-key>&ipsec_clients_start=10.10.10&ipsec_dns1=&ipsec_dns2=&ipsec_wins1=&ipsec_wins2=&ipsec_local_public_interface=wan&ipsec_client_list_username=&ipsec_client_list_password=&ipsec_dead_peer_detection=1&ipsec_dpd=10' \
--insecure \
&& sleep 30 &&
## Logoff
curl -b /tmp/cookie-jar.txt 'http://192.168.1.1/Logout.asp' \
-H 'Referer: http://192.168.1.1/Advanced_VPN_IPSec.asp' \
--insecureUnderstanding the script further
We need to first authenticate to the router, which is done by the login curl command we created in part 1.
Next, the && tells the OS to execute the next command if the previous command ran correctly, effectively allowing us to string multiple commands in succession.
Sleep tells the OS to pause for a number of seconds. We pause for 3 seconds between login and executing the VPN enable change, then we pause for 30 seconds to allow the router to apply the setting before logging off.
To save the file, press Escape and ":wq" to write the changes and quit out of vi.
We can confirm the file was saved correctly by catting the file.
cat ~/Enable_VPN.shCreate the Disable VPN Script
This will be an easy change. We will copy the Enable_VPN.sh file and edit the ipsec_server_enable= parameter to ipsec_server_enable=0.
cp ~/Enable_VPN.sh ~/Disable_VPN.shOpen vi again and edit ipsec_server_enable to 0.
vi ~/Disable_VPN.shPress "i" for insert mode.
Locate the parameter 'ipsec_server_enable' and update the value to 0.
When done, press ':wq' to write the file and quit vi.
Make the files exeacutable.
chmod +x ~/Enable_VPN.sh
chmod +x ~/Disable_VPN.sh
Confirm that the scripts execute successfully
~/Enable_VPN.shIf this runs successfully without any errors, login to the router and confirm the VPN settings have been enabled. If so, confirm the disable script by running the Disable_VPN.sh command and check for the VPN setting to be disabled on the router's settings page.
If both the enable and disable VPN scripts run successfully, we are ready for part 3.