
Getting Fancy with Nested ESXi
This guide will walk you though the steps needed to customize William Lam's ESXi OVAs to provide additional deployment options. But first, let's look at a few key items.
What Is Nested Virtualization?
Quite simply, it's running a hypervisor inside of another hypervisor, or in the case of this guide, ESXi inside of ESXi. This is very helpful in lab environments and when you want to test certain features or build automated workflows without having dedicated hardware.
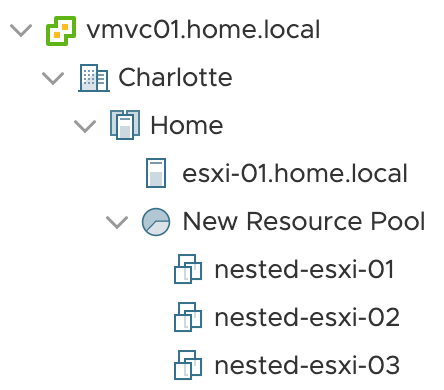
In my home lab environment I have 2 physical servers. With nested virtualization, I can carve those hosts up and deploy additional virtual ESXi hosts, allowing me to test things that normally require several physical servers like VMware Cloud Foundation (VCF), NSX-T, PKS, etc. This has also proven to be very helpful when trying to write ansible playbooks to automate vSphere provision tasks as I can spin-up ESXi hosts on demand.
Nested ESXi OVAs
William Lam is an exceptional blogger that has been writing posts about VMware products for years. He is well known in the VMware circles for his site https://www.virtuallyghetto.com/
William is also the creator of the infamous ESXi OVAs, which are pre-created ESXi "appliances" that make deploying nested ESXi hosts even easier.
Before the discovery of these ESXi OVAs, If I needed to deploy a nested ESXi host, I would have to run through a series of steps including creating a new VM, downloading and attaching the latest flavor of ESXi, and installing ESXi using the installer. This also required me to go into each VMs console to configure the host's IP, DNS, NTP, hostname, etc.
With these OVAs, I discovered that I can pass all of these paramters to the ESXi host directly, making the deployment of nested hosts easier.
While this was a fantastic upgrade to deploying via an ESXi mounted ISO, it meant that more work was needed to edit the default VM configuration.
I wanted to expose even more options through the process like number of vCPUs, Disks, RAM, and network devices. This lead me down a journey of understanding OVAs to a greater depth, and how to edit certain files within them to provide new options.
Downloading the OVA File
William Lam provides links to the ESXi OVAs at his blog post here - https://www.virtuallyghetto.com/nested-virtualization/nested-esxi-virtual-appliance
Locate the latest version of ESXi and click the link to download. For this guide, we will be using Nested_ESXi7.0_Appliance_Template_v1
Note: These are about 500MB in size.
Extract the OVA using Tar
Windows 10 users - Good news! Windows 10 now ships with tar, so you'll be able to follow along without having to download anything extra.
Once the download completes, navigate to the folder in which you downloaded the OVA and extract it using tar. Be sure to replace the filename and path with the file that you downloaded.
cd ~/Downloads/
tar -xvf Nested_ESXi7.0_Appliance_Template_v1.ova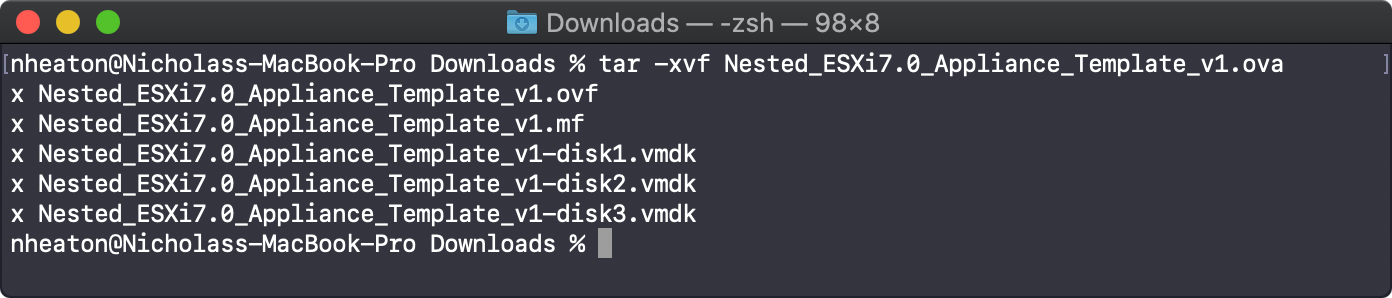
A closer look at OVAs
While we have this OVA extracted, you will notice that we have three types of files.
- OVF
- MF
- VMDK
OVF - XML file that contains metadata and deployment parameters for the OVA
MF - Text file that contains the SHA1 checksum of every file within the OVA (except itself)
VMDK - Virtual Disk file that represents a virtual hard drive. This is where the ESXi hypervisor is installed.
Modify the OVF File
By default, the 7.0 version of the nested ESXi OVA configures the VM to have
2 vCPUs
8 GB of RAM
3 Disks (2x 4GB, 1x 8GB)
2 vNICs
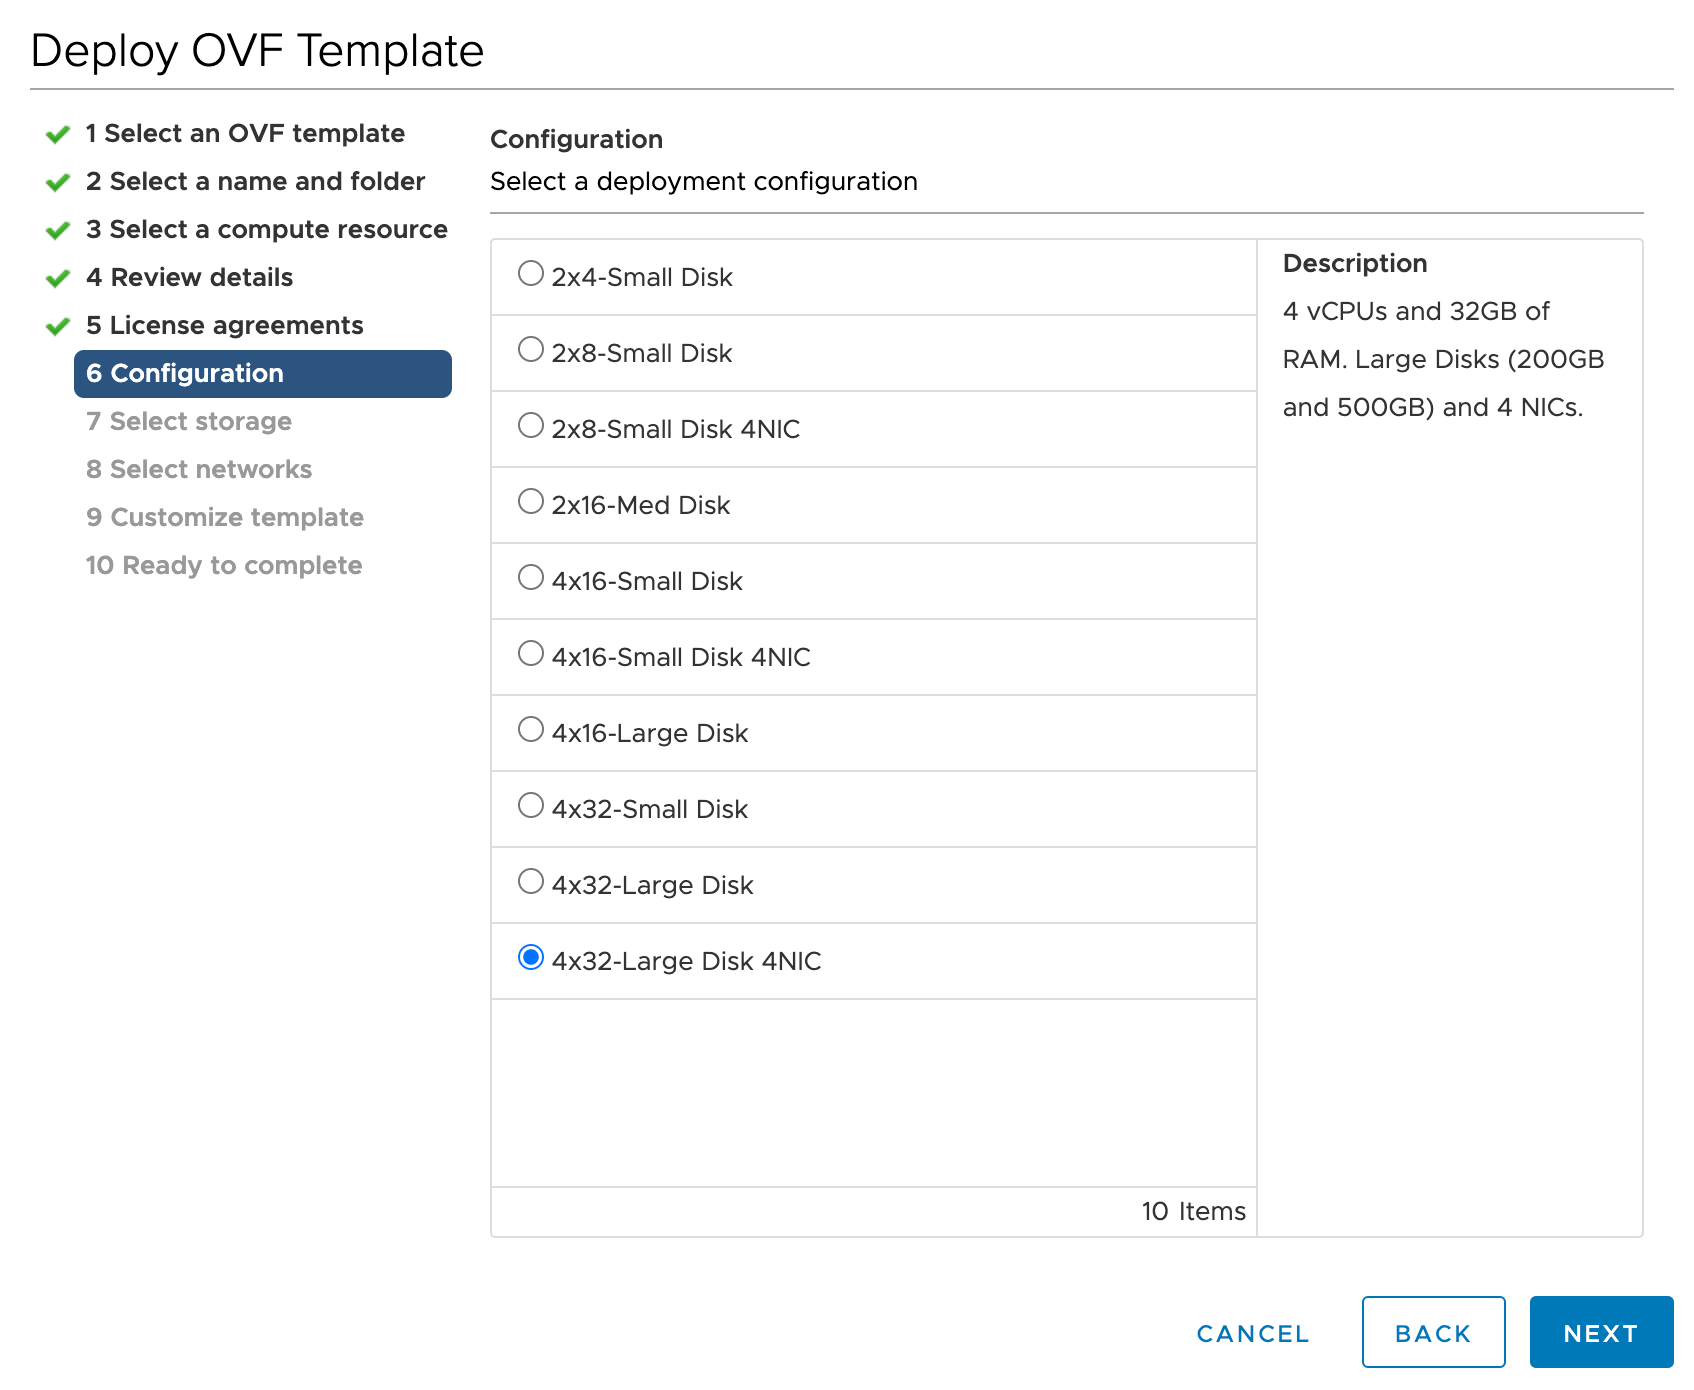
But what if we want to test something that requires hosts with more CPUs, RAM, or Disk capacity? What if we want to test something (NSX-T for example) with a 4 pNIC configuration?
By leveraging my custom made OVF file, you will be presented with customization options during deployment. This reduces the need to edit the Nested ESXi host VMs post deployment.
Custom OVF File -- Download Link
If you want to learn how to edit these files for yourself, please check out my blog post where I cover this in detail here.
Update Checksum of OVF File
After downloading the OVF file (or editing if you chose to make your own), the checksum will change. We need to update the checksum stored in the MF file.
MacOS
shasum Nested_ESXi7.0_Appliance_Template_v1.ovfWindows
Get-FileHash C:\path\Nested_ESXi7.0_Appliance_Template_v1.ovf -Algorithm SHA1Linux
sha1sum Nested_ESXi7.0_Appliance_Template_v1.ovfOpen the Nested_ESXi7.0_Appliance_Template_v1.mf file, locate the line for the ovf file and edit the checksum to match the output received from running the previous command.
If you are using my OVF file, the checksum should be fdcc4143bdb73dcdd623ca74204dafc67bd925d9
Recreating the OVA File
A special note for MacOS users, do not use tar to create the OVA. It will add additional data to the tar file that vSphere won't know how to handle.
Instead, download GNU targtarusingbrewand use that instead.
Don't have brew? Install here.
brew install gtargtar -cvf Nested_ESXi7.0_Appliance_Template_v1.ova Nested_ESXi*Do I Really Need an OVA?
It depends.
You can deploy virtual appliances using only OVF and VMDK files. However, keeping everything in one file keeps things easy and organized.
Additionally, some automation tools (Ansible) will only let you deploy an OVA file, so in these instances it's required to re-package the files back into an OVA.
If you wish to omit re-packaging the files back into an OVA, you will need to select all of the files (OVF + VMDKs) when deploying in vCenter.
Deploying the OVA in vCenter
Deploy the OVA in vCenter like you normally do, but this time, you'll notice that you will be presented with quite a few new options. Select the option that works best for your needs.
A Special Note To Users Deploying Nested ESXi Using Ansible
You can call these deployment options and parameters in Ansible using the vmware_deploy_ovf module.
Note the deployment_option parameter which lets you select the parameter, and the properties section which let's you pass in an array of properties for the OVA you are deploying.
  tasks:
    - name: Deploying ESXi OVA to vCenter
      vmware_deploy_ovf:
        datacenter: "{{ datacenter }}"
        cluster: "{{ cluster }}"
        hostname: "{{ vcenter_hostname }}"
        username: "{{ vcenter_username }}"
        password: "{{ vcenter_password }}"
        validate_certs: No
        name: "{{ item.name }}"
        datastore: "{{ datastore }}"
        disk_provisioning: "thin"
        networks: "{{ nested_esxi_hosts_network }}"
        ovf: '{{ esxi_ova_path }}'
        power_on: 'yes'
        deployment_option: '{{nested_esxi_vm_size}}'
        fail_on_spec_warnings: 'false'
        wait_for_ip_address: 'yes'
        properties:
          guestinfo.hostname: "{{item.name}}"
          guestinfo.ipaddress: "{{item.ipaddress}}"
          guestinfo.netmask: "{{item.netmask}}"
          guestinfo.gateway: "{{item.gateway}}"
          guestinfo.vlan: "{{item.vlan}}"
          guestinfo.dns: "{{nested_esxi_hosts_dns}}"
          guestinfo.domain: "{{nested_esxi_hosts_domain}}"
          guestinfo.ntp: "{{nested_esxi_hosts_ntp}}"
          guestinfo.syslog: "{{nested_esxi_hosts_syslog}}"
          guestinfo.password: "{{nested_esxi_hosts_password}}"
          guestinfo.ssh: "True"
          guestinfo.createvmfs: "False"
And that's all there is to it. Again, if you want to dig deeper and learn how to edit the OVF file directly, check out this blog post.